One reason these cookies—some might say candies—are a great summer treat is because they require no baking. You can whip up a batch in mid-July without heating up your kitchen. As for gourmet, that refers to the chocolate (and obviously not the appearance). You don’t have to use premium chocolate chips for this recipe, but the better the chocolate, the better the haystacks. To reduce the overall price per ounce, I buy 3-pound bags of Ghirardelli Double Chocolate Bittersweet Chips.
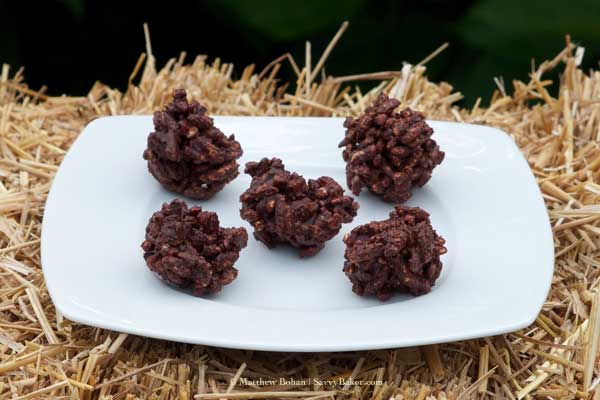
All right, now to address the image below. I might as well crack the jokes before you do, and I should consult a food stylist before attempting a photo shoot of chocolate-coated snacks again. As usual, Matt did a great job with the photos, but the look of the food itself leaves a little to be desired. Indeed, if I saw something like these anywhere near a bale of hay, I’m not sure I would consider eating them!
Now for the real dirt: these are phenomenal! The only problem with making them is that I can’t stop eating them! Sure, the brown rice and millet offer some highly touted nutrients, and the peanut butter and walnuts add protein to the mix. Because of the chocolate chips, however, it would be a real stretch to say that these are good for you. As an occasional treat, they are excellent, and for those who have a chocolate craving, these are a good alternative to solid chocolate or another higher-calorie, less nutritious option.
Gourmet Multigrain Haystacks
Adapted from a recipe on the side of a Kashi cereal box
Makes 30-36 haystacks
2 cups puffed brown rice cereal
1 cup puffed millet cereal*
1/2 cup crushed walnuts
1 cup premium dark, bittersweet, semi-sweet or Belgian chocolate chips
1/2 cup smooth natural peanut butter
* If you don’t have any available, omit the millet and use a total of 3 cups of puffed brown rice instead.
- Line two mini-muffin tins with paper cups.
- Combine puffed grains and walnuts a large bowl. Set aside.
- Put chocolate chips and peanut butter in a microwavable bowl or glass. Microwave on high for 30 seconds and then stop to stir. Mixture should be smooth. If necessary, microwave for another 15-30 seconds. Note: be careful, for microwave times vary, and chocolate burns easily.
- Pour wet ingredients into dry ingredients, stirring until everything is evenly coated.
- Transfer mixture one spoonful at a time to prepared cups.
- Cover and refrigerate.
- Allow to cool and set before serving.
Store in a tightly sealed container in the refrigerator for up to one week.
© Liesl K. Bohan | SavvyBaker.com
